Keven’s Clinic – Removing and Installing Wheels

Holland_logoWelcome to Keven Lee’s Mechanical Skills Clinic, courtesy of Holland Cycles.  This is the second of a series based on his clinic for WWSD riders on May 14, 2014.  We started off with a pre-ride bike check…This is on how to remove and install wheels to the bike frame.

Removing the Wheel (Procedure varies Front to Rear)

 Front Wheel

1. Open the brake cable quick release (usually a quick release you flip up with your thumb).

2.  Open the quick release (QR) lever on the wheel, and unthread the nut on other side of QR. The nut only needs to be unthreaded far enough to clear the tabs on the bottom of the fork. NOT completely off!

3. Simply lift the bike holding the handlebar or stem and the wheel should come free from the fork. Sometimes you may need to finesse the tire through the brake pads.

Rear Wheel

1. Start with your chain on the highest gear (smallest cog).

2. Open the brake cable quick release.

3. Open the QR lever on the wheel. Note : The rear wheel does not require the nut on the other side of the quick release to be unthreaded.

4. In a simultaneous motion:

a)      Lift the bicycle by the saddle or top tube

b)      Push the derailleur cage, and rotate the derailleur out of the way from the cassette.

c)      The wheel should fall freely away from the frame. Note: Sometimes the wheel may require a little finessing the tire through the brake pads.

 Now for putting them back on…

Installing the Wheels (Procedure varies Front to Rear)

 Front Wheel

1. Lift the bike by the handlebar or stem.

2. The wheel should go evenly into the fork dropouts.

3. Make sure both sides of the fork go onto the axle properly. You may need to finesse the tire through the brake pads.

4. Check that the wheel is centered in the fork.

5. Hold the wheel’s quick release (QR) lever with one hand, and tighten the nut on the other side a bit tighter.

6. Find the “sweet spot” between tightening the nut and being able to close the QR lever. It should be tight to close, but not too tight. The nut needs to be threaded on approximately 95%.

– Closing the QR lever. In order to close the QR, the nut needs to be tight enough to create tension on the QR lever when it is closed. Note: The QR lever should leave a light discoloration / impression in your hand while closing it.

7. Re-check that the wheel is centered in the fork.

8. Close the brake cable quick release lever (restore to its normal position).

9. Squeeze the brake to make sure the pads are not pushing the wheel to one side. If so, the wheel is either not centered, or the brake pads are not centered properly (advanced topic).

Rear Wheel

1.  Make sure the derailleur is in the highest gear position (smallest cog).

2. Make sure the brake cable quick release is in the open position.

3. Position the wheel in between the rear triangle.

4. Position the smallest cog directly under the upper derailleur pulley. Make sure the chain is seated properly on the teeth of the cassette e.g. around both sides of the cassette.

5. In a simultaneous motion:

– Push down on the bicycle by the seat or top tube.

– Push the derailleur cage, and rotate the derailleur.

– The wheel should fall right into position within the derailleur.  The wheel should go evenly into the rear dropouts.  Make sure both sides of the frame go onto the axle properly.    You may need to finesse the tire through the brake pads.

6. Check that the wheel is centered in the frame.

7. Hold the QR Lever with one hand, and thread the nut tighter on the other side.

8. Find the “sweet spot” between nut and QR lever, and close the QR.

If you did not unthread the QR when the rear wheel was removed, you simply should be able to close the lever and have the QR at proper tension.

9. Re-check that the wheel is centered in the frame

10. Lift the bike by the seat or top tube, and pedal the crank a few revolutions with your hand.

– The chain should run smoothly after 3 or 4 crank revolutions.

– Shift the right shifter a few times (5 if it will let you), and then lift the bike and pedal the cranks a few more times. This will help you start off in an easier gear.

11. Re-Check that the wheel is centered in the frame.

12. Close the brake cable quick release (restore to previous position).

13. Squeeze the brakes. Check to see if the pads are pushing the wheel to one side. If so, the wheel is either not centered, or the brake is misaligned (advanced topic).

 Next post: replacing the tube!
Keven’s Clinic – Pre-ride Bike Check

Holland_logoWelcome to Keven Lee’s Mechanical Skills Clinic, courtesy of Holland Cycles.  This is the first of a series based on his clinic for WWSD riders on May 14, 2014.  Starting off with the pre-ride bike check…

  1. Chain should be lubricated:

– Chains should be lubricated approximately every 200 miles.

– Ideally,  apply chain lube 12 hrs prior to riding .  This allows solvents to evaporate, and chain lubricant to adhere to the chain.

– Spin the pedals for a few revolutions to work the lube into the chain.  Then wipe all excessive oil/grime from chain.  It is impossible to wipe the lubricant from where it is needed on the chain. The chain should look clean and feel dry to the touch after its been lubricated, and properly wiped off.

2. Tires should have the correct pressure:

– Rider Weight <  90lbs – – – – 80-95psi
– Rider Weight   90-120lbs – – 90-105psi
– Rider Weight > 120lbs       – – – 95 -115psi

3.  Check the Bike Over Front to Back:

– Wheels: Check that the quick release (QR) levers are tight, and the wheel is centered. Some tires are directional. Always remember QR Levers go on the non-drive (left) side of the bicycle. Wheels should not have play. They should spin freely, without wobbling side to side.

– Check that your handlebar, stem, and brake hoods are tight. (It helps to use a torque wrench or have a shop check the stem hardware monthly.)

– Check your saddle is tight, and your seat height is correct. [Once you get your bike adjusted properly, mark seat post just above where it inserts into the bike frame. Whiteout is ok for marking seat posts.]

– Pedals and cranks (ball bearings) should not have side to side movement or play, and should spin freely.

 GO RIDE!

Holland Cycles and WWSD host our first bike mechanic skills clinic

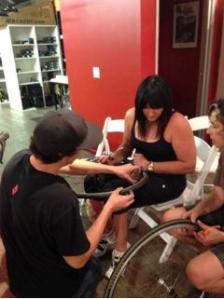
In spite of the outbreak of eight or nine major fires in North County San Diego, nine participants attended the first bike mechanic skills clinic co-hosted by Holland Cycles and WWSD.   The motivation behind this event was the overwelmingly popular request from our feedback surveys in 2013 from you all. “We want a clinic on bike mechanic skills!!”

All participants were very engaged in the clinic and got some hands on experience with tire changing, using CO2 inflators and other basic skills.

Topics covered:

  • Chain Maintenance
  • Tires, optimal inflation pressures
  • Tips: Before ride checks
    • seat/seat post
    • handlebars
    • cranks
    • pedals
    • wheels
    • brakes
    • chain
  • Quick release wheels: positioning of levers and how tight should they be when putting the wheels back on the bike
  • Flat repair – hands on, hints & tips
    • getting tire off/on
    • preventing/checking for pinch flats
    • alignment of tire, finding source of flats
  • CO2 .vs. pumps
    • pros/cons
    • how a C02 works
    • empty and re-fill with air after you get home

Mech_Clinic_1_photo2

Kevin and Charles of Holland Bikes were very generous with their time.  The clinic began at 6:15 and there were seven gals still talking/working with them at 8:30pm!
Kevin and Charles of Holland Bikes were very generous with their time. The clinic began at 6:15 and there were seven gals still talking/working with them at 8:30pm!


We plan to have more bike mechanic clinic events in the course of our season, hopefully not as a side show to fires burning out of control all over San Diego County.

We  also plan to host a more advanced (“Level 2”) clinic to cover additional topics such as adjusting derailleurs, adjusting cables, and fixing a broken chain.


Frame pump or CO2 inflator?

You’re out on a beautiful day, having a marvelous ride, and suddenly you look down and you have a flat tire. Blah.  Ok, well let’s get out the frame pump, tire irons and spare tube.  And get ready to do some bicep flexing. Unless….

You happen to have a CO2 inflator in your saddle bag.  Shazaam.  No fuss no mess.  What’s that? You never used a CO2 inflator?  Don’t feel bad, I haven’t either. And I’ve fixed plenty of flats out on the road.

There are two basic options for pumping up a flat tire out on the road, either using your trusty frame pump or using a CO2 inflator. There are pros and cons to each.

Frame pumps

I always have a frame pump on my bike, and I mean a real frame pump about the length of your top tube, not a 6 inch “mini”.  50-60 pumps using such a frame pump should achieve reasonable tire pressure, maybe a bit more for the rear tire where you want maybe 85 lbs to avoid pinch flats from hitting bumps.

Frame pumps come in different lengths to fit on your frame.  Some fit underneath the top tube (the beam from saddle to handlebars) , and some on the down tube (where your water bottles are). So when you buy your frame pump, make sure it actually fits snugly, especially if you plan to secure it along the top tube.  The length of a top tube on one one bike may be quite different from the next.    For good measure, I use a velcro strip to anchor my frame pump tothe top tube because riding over railroad tracks or cattle guards can shake them loose.

The big advantage of a frame pump is you never run out of air. You might run out of spares and have to resort to borrowing spares from passing cyclists or using a patch kit to patch a hole. But you always have air.  Also you can pretty much control how much pressure gets into the tire, that is if you are willing to work at it long enough.


"Huff, puff...wish I had one of those inflator things!"
“Huff, puff…wish I had one of those inflator things!”

The big disadvantage of a frame pump is it is a tiring and time consuming process to pump up a tire. The first 30 pumps are easy because there is very little pressure to push against. Over 60 pounds is when you have to work hard. Be careful not to be push too hard against tube valve when pumping the last pounds of pressure. I use my left hand to hold the pump and valve down and minimize the torquing on the valve stem.  Some frame pumps come with a decent handle to make it a bit more comfortable to pump high pressure into a tire.

CO2 Inflators

A CO2 inflator is a device that fits in the palm of your hand.  You attach a small cartridge (about 2 inches long) of compressed CO2 to it, and then place the ‘head’ of the inflator (sometimes called the nozzle) onto the tube valve.  There is usually a little button to release the CO2 gas in the cartridge into the tube, and presto bango! The tire is instantly inflated. You cannot control the exact pressure in the tire but it should be adequate pressure to get you home.

CO2 inflators come in two types. One type is just a nozzle that the cartridge screws into, and the other type comes with a handle into which the cartridge is inserted, and a nozzle.

The nozzle type takes only threaded cartridges.  The CO2 cartridge is screwed onto the nozzle.  You will hear a little bit of gas escape as the nozzle pierces the cartridge. This primes the nozzle.  Then the other end of the nozzle is snugged down over the tube valve.

This nozzle is primed with CO2 and ready for inflation. This CO2 inflator is just a nozzle. The cartridge is already threaded on.  Now just press the little red button…!
This nozzle is primed with CO2 and ready for inflation.
This CO2 inflator is just a nozzle. The cartridge is already threaded on. Now just press the little red button…!

Then to release the pressure into the tire, there is usually a button on the nozzle to press. Be careful to have gloves on because the CO2 cartridge will get pretty cold on releasing gas.


For the nozzle and handle type, the main difference is the CO2 cartridge need not be threaded because the cartridge is placed inside the handle. Then the nozzle is then screwed onto the handle and pierces the cartridge with a small amount of gas escaping.  Now the nozzle is primed to release the gas into the tire.  Just snug the unit onto the valve and press the release button. Whoosh! Your tire is inflated and ready to go!

Note the non-threaded CO2 cartridges. The  cartridge goes in the handle, shown here  with the nozzle already on.
Note the non-threaded CO2 cartridges. The
cartridge goes in the handle, shown here with the nozzle already on.


Here is a handy YouTube clip that demonstrates how to use the Performance Quik Shot CO2 inflator:

http://www.youtube.com/watch?v=ItpqUSuy2nA


No worries about over inflating your tire or the cartridge exploding.  Just make sure you get a cartridge for your tire size.  For most road bikes e.g. 23cc tire, that would be a 16g cartridge.  Ask at your local bike shop to be sure.

Important: when you get home from your ride, let the CO2 out of the tire that flatted and replace with atmospheric air. CO2 leaks from tires faster than normal air.  The next day you might discover your tire is flat again.  But it isn’t! It just leaked the CO2 out.

The big advantage of CO2 inflators is the quickness and ease of inflating a tire. The disadvantage is you can run out of cartridges on “one of those days”.   Also occasionally an inflator nozzle fails to get adequate pressure into a tire. A frame pump might be necessary to top off the tire pressure.

My recommendation is be to bring a CO2 inflator and a frame pump, especially on longer rides.  Neither are that heavy and are easily carried on the bike  frame or saddle bag. Neither are terribly expensive either. Frame pumps can be had for $30-40. CO2 inflators can be as low as $15 or as pricey as $30.  Make sure you try the CO2 inflator at home first or at your local bike shop first!

If you feel guilty at not working your biceps you can go work out at the gym after the ride, because hey! you saved all that energy not having to pump up your tire  😀


A brief history on bike tires and tubes

Road cycling is a sport that requires riding on very skinny thin tires, under very high pressure over many hidden sharp objects and rough roads.  To consider this a rational undertaking, one should know where bike tires/wheels evolved from to appreciate what we have now.

The first bicycle “tires” were iron bands on wooden wheels of bikes called velocipedes.  These bikes were invented in the mid 1800s and  sometimes  called “bone shakers”. Iron bands were replaced by solid rubber tires. In an attempt to further soften the ride, rubber tires with a hollow core were also tried.

My first bike
My first bike

Charles Goodyear’s 1865 invention of the process of vulcanization of rubber transformed rubber into flexible material that was ideal for bicycle tires.

The first practical pneumatic tire was made by John Boyd Dunlop in 1887 for his son’s bicycle, in an effort to prevent the headaches his son had while riding on rough roads. This led to the founding of Dunlop Pneumatic Tyre Co. Ltd in 1889. In 1890, Dunlop added a tough canvas layer to the rubber to reduce punctures.  Riders quickly adopted the pneumatic tire.

My second bike
My second bike

These tires had rubber treads and a modified leather hosepipe for the  “inner tube” to hold air. It was not long before these were replaced with rubber inner tubes .  Which is good because I have no idea what a horsepipe is and  horses probably wanted to keep their horsepipes back in the day.

Finally, the detachable tire replaced the single unit of wheel and tire in 1891 by Édouard Michelin. The tire was held on the rim with clamps, instead of glue, and could be removed to replace or patch the separate inner tube.

“Clamps? Like office binder clamps? Bwaaahhhh….”

In 1893, father and son team, August and George Schrader designed a better tire valve system providing the much needed air-tight seal to prevent the tires from rapidly losing air.   Almost all road tires tubes have Presta valves for designed for higher pressure.

Presta on the left, Schrader on the right

Presta valves come with a grommet (little screw on disc on the Presta valve in the photo) to help hold the valve in place when pumping up the tire.   There is a valve head on the end of the valve that should be unscrewed when pumping air into the tube, and tightened back on when sufficient tire pressure is reached.

A Presta tube should be capped (not shown in  photo) when the tire is inflated and ALWAYS when putting the spare tube in a saddle bag, or the valve may wear a hole in the tube rubbing against it. Also helps keep dirt and grit out of the valve.

Almost all riders now use clincher tires.  A clincher tire is an open tire where the inner tube is placed inside, and that whole assembly is stretched over and onto a wheel rim.  Clinchers originally relied on air pressure to hold the tire bead (where the tire tucks into the rim) in place. However, this type of tire was not reliable and was improved upon by a wire bead with shape of, not surprisingly, a bead,  interlocked with a flange on the rim for a much more secure fit.

The tire bead (the lighter purple strip) fits inside the clincher rim. The dark purple is the outer tread. The pink strip is the tire tube.  The blue strip up top is something called rim tape. It goes on the rim of the wheel so that the tube does not rub directly against any rough edges of the rim and cause flats.
The tire bead (the lighter purple strip is the casing that ends with a bead ‘core’, the red dots).  The bead  fits inside the clincher rim. The dark purple is the outer tread. The pink strip is the tire tube. The blue strip up top is something called rim tape. It goes on the rim of the wheel so that the tube does not rub directly against any rough edges of the rim and cause flats.

Wire beads are used on inexpensive tires. Though they cannot be folded, they can at least be twisted into three smaller hoops.  There are also tires with Kevlar beads  which allow the tire to be folded for easier storage (more expensive though).  Not many riders carry an extra tire on their rides, relying on spare tubes to repair flats.

Oy veh! I got a puncture!

Tire pressure is very important.  You must have adequate tire pressure to insure a safe ride and prevent flats.

The pressure rating of tires is usually stamped somewhere on the sidewall of the tire. It is usually indicated as “Maximum Pressure” and is usually expressed as a range (for example, “90–120 psi “.  Most floor pumps display pressure in psi.  Inflating to the lower number in the pressure range will tend to increase traction and make the ride more comfortable. Inflating to the higher number will tend to make the ride more efficient and will decrease the chances of getting a flat tire; when hitting pothole or bump, a tire can compress to the rim and thus pinch the tube. These are called “pinch flats”.

Inner tubes are not completely impermeable to air and slowly lose pressure over time. Remember that when you haven’t been on your bike a more than a few days.  Butyl inner tubes hold pressure better than latex.

Racing and touring bicycles use narrower tires than mountain bikes. A common size is 700 x 23cc or 700 x 25cc. These translate to roughly 3/4″ and 1″ tire widths respectively. A good combination is a 700 x 25 cc for the back tire for softer ride and longer wear, and a 700 x23 cc for the front for going faster (less rolling resistance).

New tires can be very difficult to put on.  Luckily once the tire is on, it gets stretched out so that out on the road if you flat, they are significantly easier to take on and off.  For putting on a new tire,  don’t be shy to ask your bike shop to help you with this task. Tire irons can help and are highly recommended for your saddle bag.  Be careful of any rough edges rubbing against the tubes.

If you want/have to put on a new tire by yourself, I recommend stretching out the tire first. I typically sling the tire over a door, and use a travel bag holding a 5 gallon jug of water suspended from the tire to stretch it out for a day or so.

I am not kidding about tires being hard to put on…

When all is said and done, no one is immune to flats and you will get handy at fixing them.  But aren’t you heaving a sigh of relief you do not have to ride on wooden wheels?

Next up: CO2 cartridges and frame pumps!


This WordPress.com site is the bee's knees